
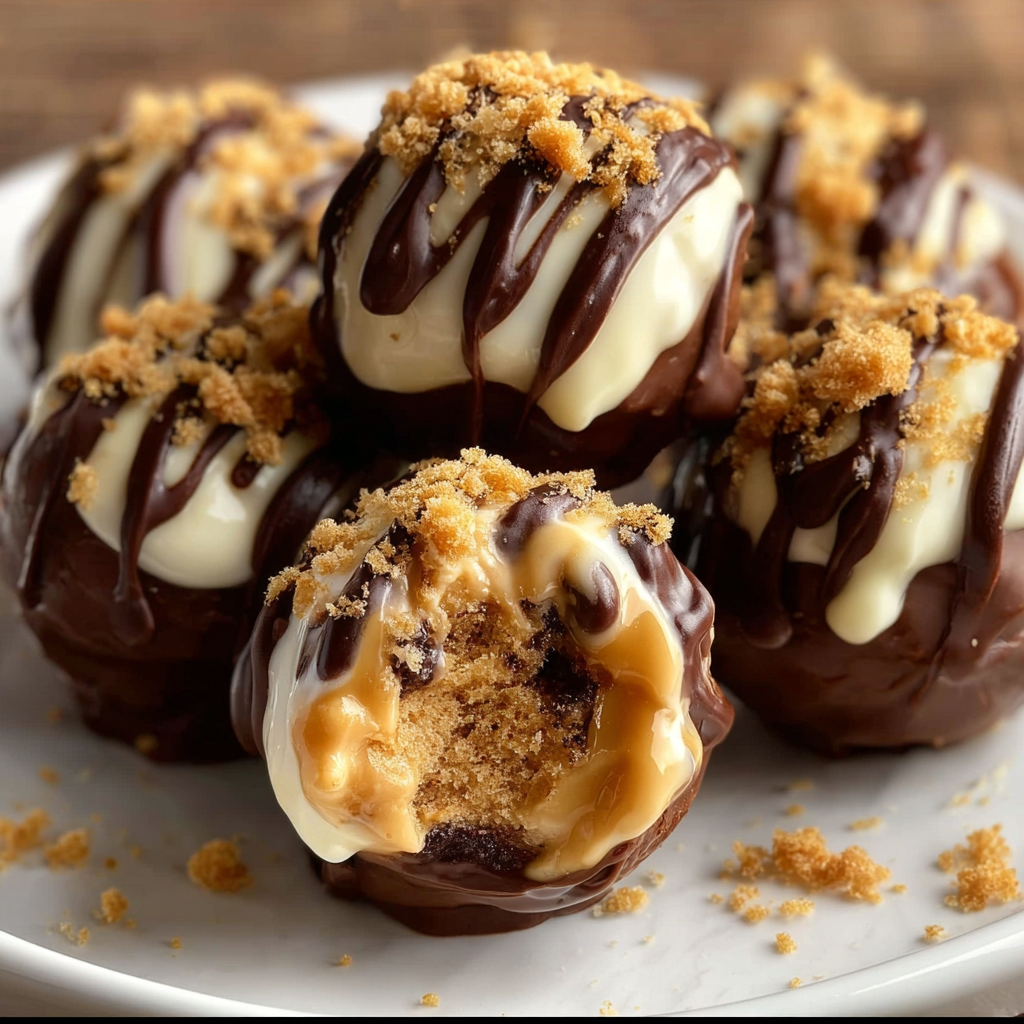
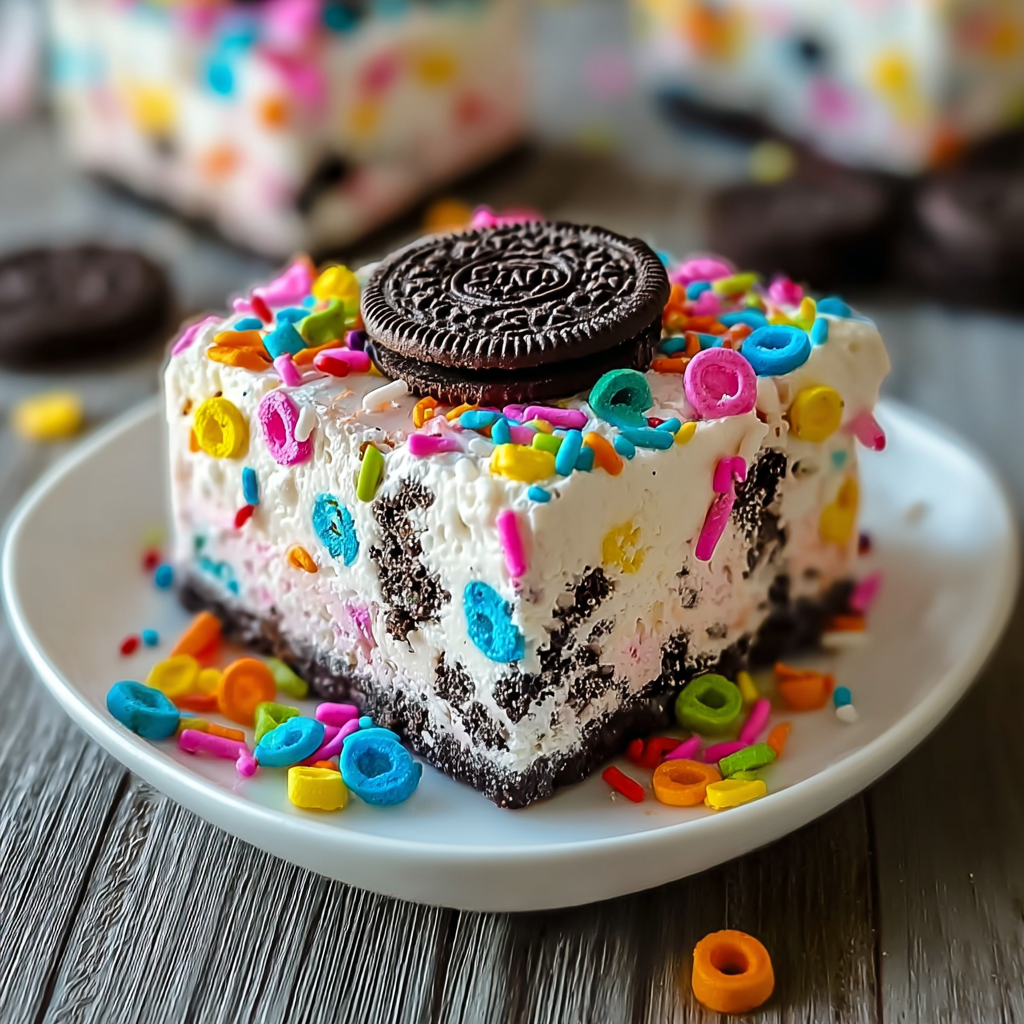
No-Bake Peanut Butter Cheesecake Balls

Creamy peanut butter and tangy cream cheese meet crunchy graham and a chocolate shell in these bite-sized, no-bake cheesecake balls—perfect for parties or a fridge stash.
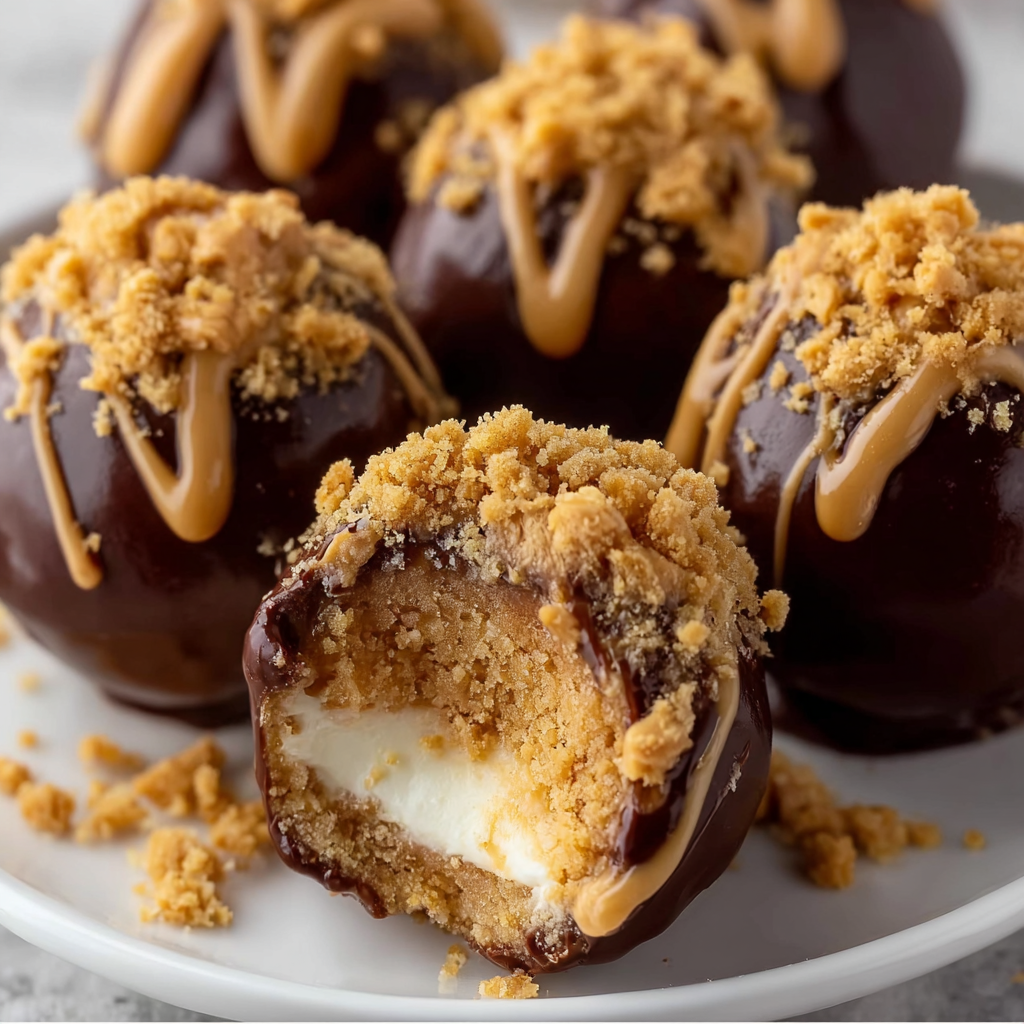
This recipe started as a quick rescue when I needed something indulgent for a last-minute gathering but didn’t want to heat up the kitchen. These No-Bake Peanut Butter Cheesecake Balls are the kind of treat that disappears faster than you can set the platter down. I discovered this combination the first time I combined leftover graham crumbs with a tub of cream cheese and my favorite jar of peanut butter; the texture and balance of sweet, salty, and creamy made me instantly write the steps down. The mixture is smooth, rich but not heavy, and the little chocolate shell gives each bite a satisfying snap.
I love making a double batch for family parties because they travel well and appeal to adults and kids alike. They’re also forgiving: if your peanut butter is a bit runny or your cream cheese is slightly cold, the final result still tastes great. These balls are the kind of recipe that has produced countless kitchen moments for me—kids sneaking one before dinner, friends asking for the recipe, and my husband declaring them perfect with a hot cup of coffee. Because there’s no oven involved, I often prepare them on a hot afternoon without turning the house into a sauna.
Why You'll Love This Recipe
- Ready in about 30 minutes of active time and sets quickly in the fridge, making it a true last-minute dessert that still looks impressive.
- Uses pantry staples like creamy peanut butter, graham cracker crumbs, powdered sugar, and chocolate chips, so you can usually pull it together without a special grocery trip.
- No oven required, which is great for hot days, small kitchens, or when you want to avoid extra heat; perfect for apartment living or summer entertaining.
- Make-ahead friendly: the balls keep well in the refrigerator for up to 5 days and freeze beautifully for up to 3 months for grab-and-go treats.
- Customizable: swap nuts, toppings, or chocolate types to suit dietary needs or to create seasonal variations.
- Crowd-pleaser at parties, potlucks, and bake sales—bite-sized portions mean people can try without committing to a slice.
When I first served these at a neighborhood potluck, I watched people come back three times. My neighbor commented that they tasted like an upscale candy, and my niece declared them the new birthday treat. Over the years I've refined the balance between peanut butter and cream cheese so the flavor is indulgent but not cloying, and the graham crumbs add just enough texture to make each bite satisfying.
Ingredients
- 8 ounces cream cheese, softened: Full-fat cream cheese gives the best texture and flavor. Bring it to room temperature for easier mixing; Philadelphia is a reliable brand.
- 1 cup creamy peanut butter: Use a smooth, well-stirred jar for consistent texture. Jif or Skippy work well. If you prefer extra crunch, use crunchy peanut butter but reduce the graham crumbs slightly.
- 1 cup powdered sugar: Confectioners' sugar dissolves into the filling for a silky finish—sift if your local brand is clumpy.
- 1 teaspoon vanilla extract: Pure vanilla enhances both peanut butter and chocolate flavors; use Mexican or Madagascar for a richer aroma.
- 1 1/2 cups graham cracker crumbs: About 8 to 10 full crackers processed to crumbs. You can substitute graham cracker crumbs with digestive biscuit crumbs where available.
- 8 ounces semi-sweet chocolate or chocolate chips, melted: Use a good-quality chocolate like Ghirardelli for a glossy finish; semi-sweet creates a pleasant contrast.
- 2 tablespoons coconut oil (optional): Adds shine and thins the chocolate for easier dipping; omit if you prefer a sturdier shell.
- Crushed peanuts or sprinkles for garnish (optional): Adds crunch and visual appeal; use unsalted roasted peanuts for contrast with sweet chocolate.
Instructions
Prepare the Filling: In a large mixing bowl, beat together the softened cream cheese and 1 cup creamy peanut butter until smooth using a hand mixer or stand mixer on medium speed. Add 1 cup powdered sugar and 1 teaspoon vanilla extract and continue mixing until fully incorporated and silky. The mixture should be lump-free and gently spreadable. If it seems too loose, chill it briefly to firm up before adding crumbs. Add Graham Cracker Crumbs: Fold in 1 1/2 cups graham cracker crumbs gradually using a spatula so the texture becomes uniform. The crumbs should absorb moisture and the mixture should be firm enough to hold its shape when rolled. If the mixture is too sticky, add a tablespoon more crumbs at a time until it holds together. Avoid over-mixing which can make the texture too dense. Form the Balls: Use a small cookie scoop or a tablespoon to portion the filling into roughly 1-inch balls. Roll quickly between your palms to form smooth spheres and place them on a baking sheet lined with parchment paper. Work briskly if your kitchen is warm to prevent the filling from becoming too soft. Chill the Balls: Refrigerate the formed balls for at least 30 minutes to firm up. This step is crucial: chilled centers make dipping easier and prevent the chocolate from seeping in. For best results chill for 60 minutes if you have the time. Melt the Chocolate: Place 8 ounces semi-sweet chocolate and 2 tablespoons coconut oil (if using) in a microwave-safe bowl. Microwave in 30-second intervals, stirring between each, until smooth and glossy. Be careful not to overheat—stop when most chips are melted and stir until smooth. Coat the Balls: Using a fork or dipping tool, lower each chilled ball into the melted chocolate, tapping off excess, and return to the parchment-lined sheet. Work quickly so the chocolate stays fluid. If the chocolate thickens, rewarm briefly in the microwave for 10 seconds and stir. Garnish and Set: Before the chocolate fully hardens, sprinkle crushed peanuts or festive sprinkles on top. Refrigerate for an additional 15 to 20 minutes until the chocolate shell is fully set. Store in an airtight container in the refrigerator.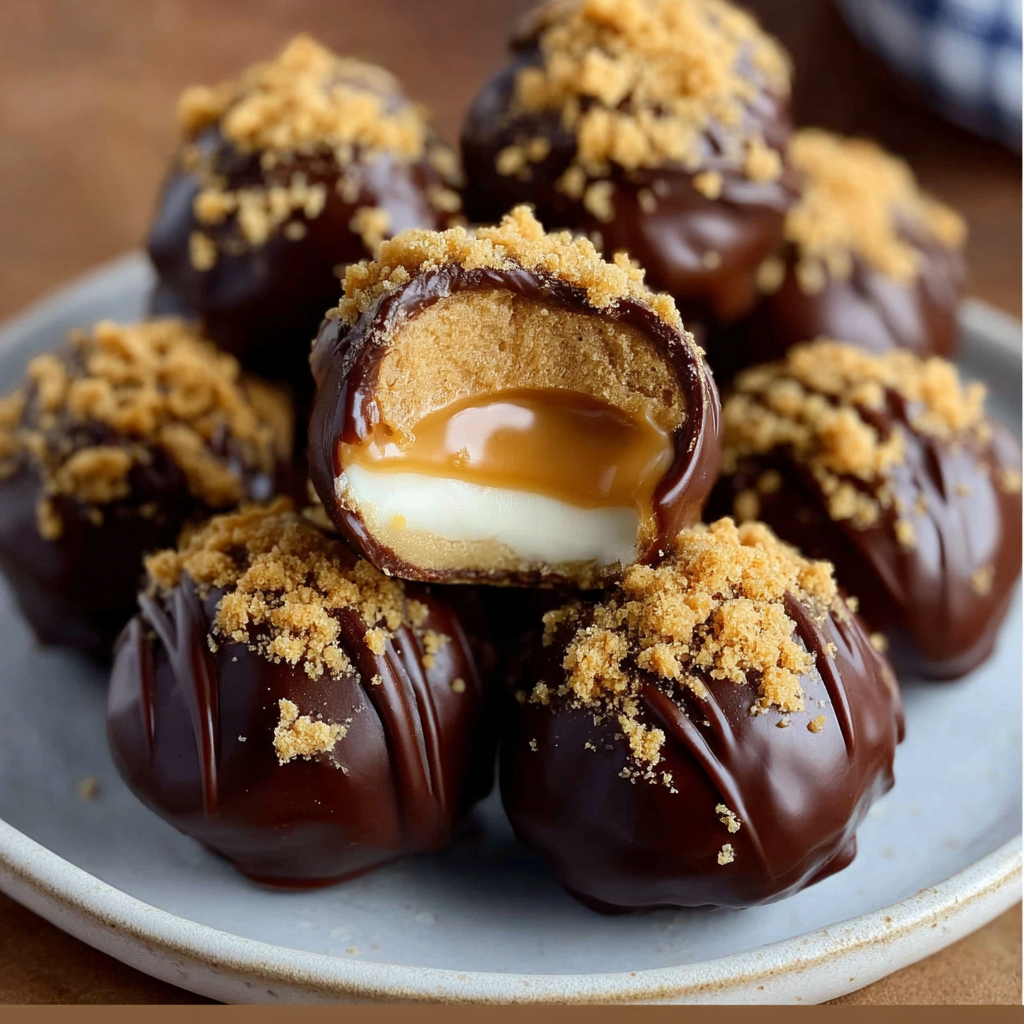
You Must Know
- Storage: Refrigerate in an airtight container for up to 5 days; freeze for up to 3 months. Thaw in the refrigerator for best texture.
- Nutrition snapshot: Each ball is an indulgent, calorie-dense treat—enjoy them in small portions when watching intake.
- Make-ahead: You can prepare the centers a day in advance and chill overnight before dipping for streamlined party prep.
- Texture tip: Chilling the centers well before dipping prevents cracking and ensures a smooth chocolate shell.
My favorite part is the memory of my grandmother nibbling one and closing her eyes, asking "What's in these?" because the flavor is familiar and surprising at once. Sharing them at holidays has become a tradition; they’re always placed on the dessert table and magically vanish by the end of the night.
Storage Tips
Store completed pieces in a single layer in an airtight container, or separate layers with parchment paper. Keep refrigerated for up to 5 days. To freeze, place the sheet pan of coated balls in the freezer until firm, then transfer to a freezer-safe container or bag for up to 3 months. Thaw in the refrigerator for several hours before serving. Avoid leaving them at room temperature more than one hour because the filling is dairy-based and can soften quickly.
Ingredient Substitutions
If you need to avoid gluten, substitute gluten-free graham crackers or finely ground gluten-free cookies. For a nut-free version, replace peanut butter with sunflower seed butter and top with seeds instead of peanuts. Use dairy-free cream cheese and dairy-free chocolate to make them suitable for lactose-intolerant guests, though texture and flavor will shift slightly—expect a softer mouthfeel with some dairy-free brands.
Serving Suggestions
Present them on a decorative platter with a few whole peanuts and a dusting of cocoa powder. They pair wonderfully with strong coffee, espresso, or a glass of cold milk. For a seasonal spin, swap semi-sweet chocolate for milk chocolate and top with crushed candy canes at Christmastime, or use dark chocolate and sea salt for a sophisticated finish at dinner parties.
Cultural Background
These bites are a contemporary American treat born from combining classic American flavors: graham crackers, creamy peanut butter, and chocolate. The idea of no-bake confections has roots in practicality—using pantry staples and cold-setting techniques instead of baking. Over time, these components have become staple snack and dessert flavors across the country, inspired by classic pairings like peanut butter and chocolate.
Seasonal Adaptations
Spring and summer are great for lighter toppings like toasted coconut or chopped freeze-dried strawberries. In fall, stir a pinch of cinnamon into the filling and use dark chocolate. For winter holidays, add a drop of peppermint extract to the chocolate coating and decorate with crushed candy canes for a festive crunch.
Meal Prep Tips
Make the centers up to two days ahead and keep them chilled. On the day you plan to serve, melt chocolate and dip so the shell is fresh and glossy. For potlucks, transport chilled balls on a chilled tray inside a cooler to keep their shape. Label containers with the date if freezing so you can rotate stocks easily.
These little bites combine convenience and comfort. They are proof that a few high-quality ingredients and a little time in the fridge can create a memorable dessert that becomes part of the household rotation. Make them your own and enjoy sharing them with people you love.
Pro Tips
Soften the cream cheese to room temperature for a lump-free, smooth filling.
Chill the centers until firm before dipping to prevent the chocolate from seeping in.
If chocolate thickens while dipping, reheat for 10 seconds in the microwave and stir until fluid.
This nourishing no-bake peanut butter cheesecake balls recipe is sure to be a staple in your kitchen. Enjoy every moist, high protein slice — it is perfect for breakfast or as a wholesome snack any time.
FAQs about Recipes
Can I make these ahead?
Yes. Prepare the centers and chill them; dip in chocolate just before serving for best texture.
How do I freeze them?
Freeze in a single layer on a sheet pan, then transfer to an airtight container for up to 3 months. Thaw in the fridge.
Tags
No-Bake Peanut Butter Cheesecake Balls
This No-Bake Peanut Butter Cheesecake Balls recipe makes perfectly juicy, tender, and flavorful steak every time! Serve with potatoes and a side salad for an unforgettable dinner in under 30 minutes.
Ingredients
Peanut Butter Cheesecake Balls
Instructions
Prepare the Filling
Beat softened cream cheese and peanut butter until smooth, then add powdered sugar and vanilla, mixing until silky and lump-free.
Add Graham Cracker Crumbs
Fold in graham cracker crumbs gradually until the mixture is firm enough to hold its shape when rolled.
Form the Balls
Scoop 1-inch portions and roll between your palms into smooth spheres, placing them on a parchment-lined sheet.
Chill the Balls
Refrigerate the formed balls for at least 30 minutes, ideally 60 minutes, to firm before dipping.
Melt the Chocolate
Melt chocolate and optional coconut oil in a microwave-safe bowl in 30-second intervals, stirring until glossy.
Coat and Garnish
Dip chilled balls into melted chocolate, tap off excess, place back on parchment, garnish, and refrigerate until set.
Last Step: Please leave a rating and comment letting us know how you liked this recipe! This helps our business to thrive and continue providing free, high-quality recipes for you.
Nutrition
Did You Make This?
Leave a comment & rating below or tag
@kitchenfunwithmy3sons on social media!
Categories:
You might also like...
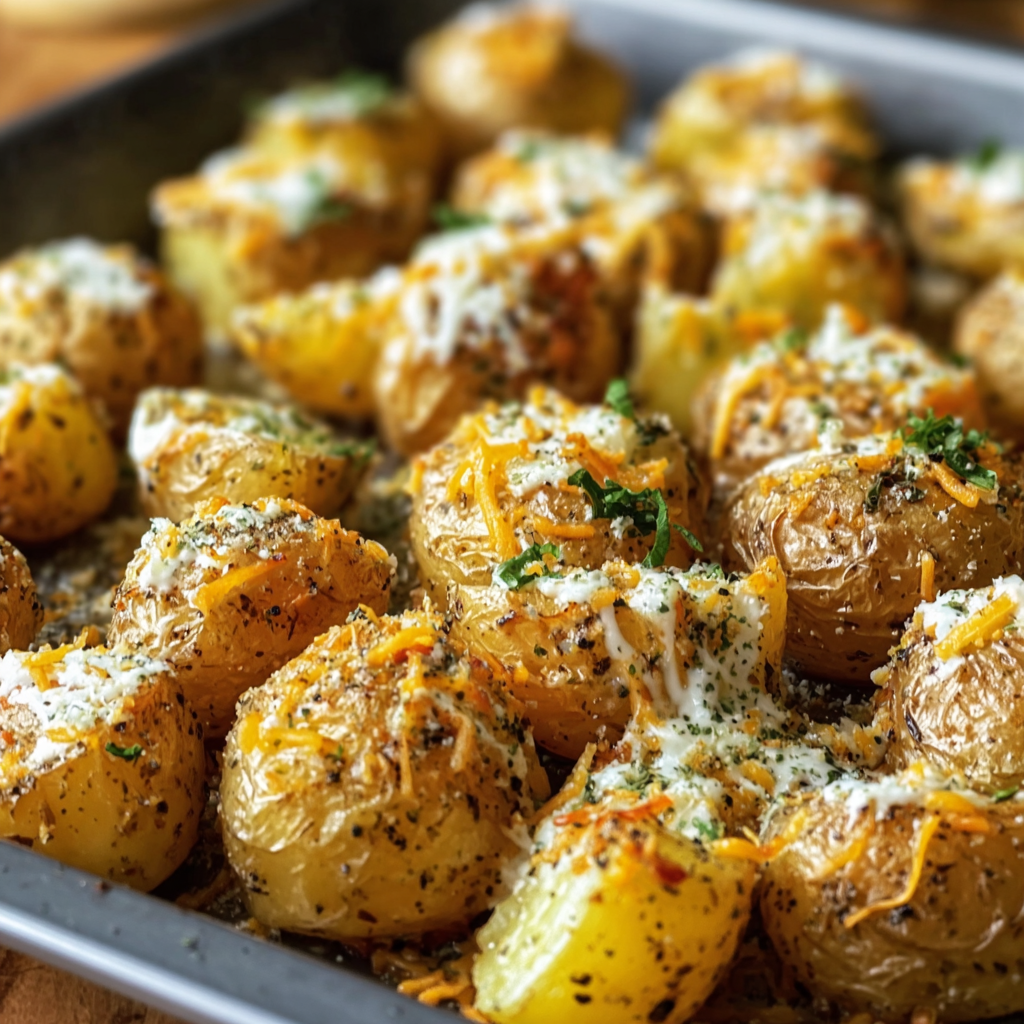
Cheesy Ranch Oven Roasted Potatoes
Golden baby potatoes roasted until crisp and tossed in ranch seasoning, Parmesan, and melty cheddar — an easy, crowd-pleasing side that’s ready in under an hour.
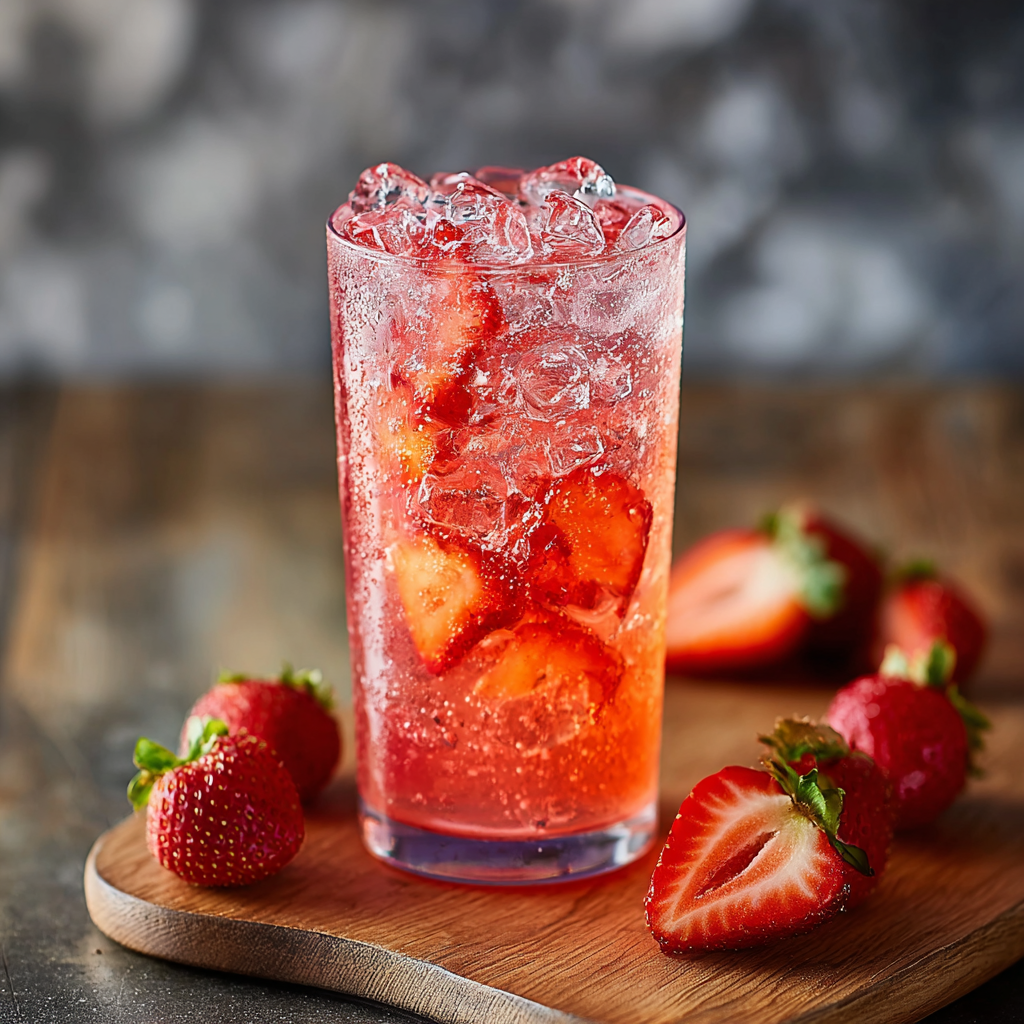
Strawberry Dirty Sprite Drink
A fizzy blend of strawberry syrup, fresh lime, and lemon-lime soda, served chilled with vibrant garnishes for the ultimate refreshing beverage — boozy or not.
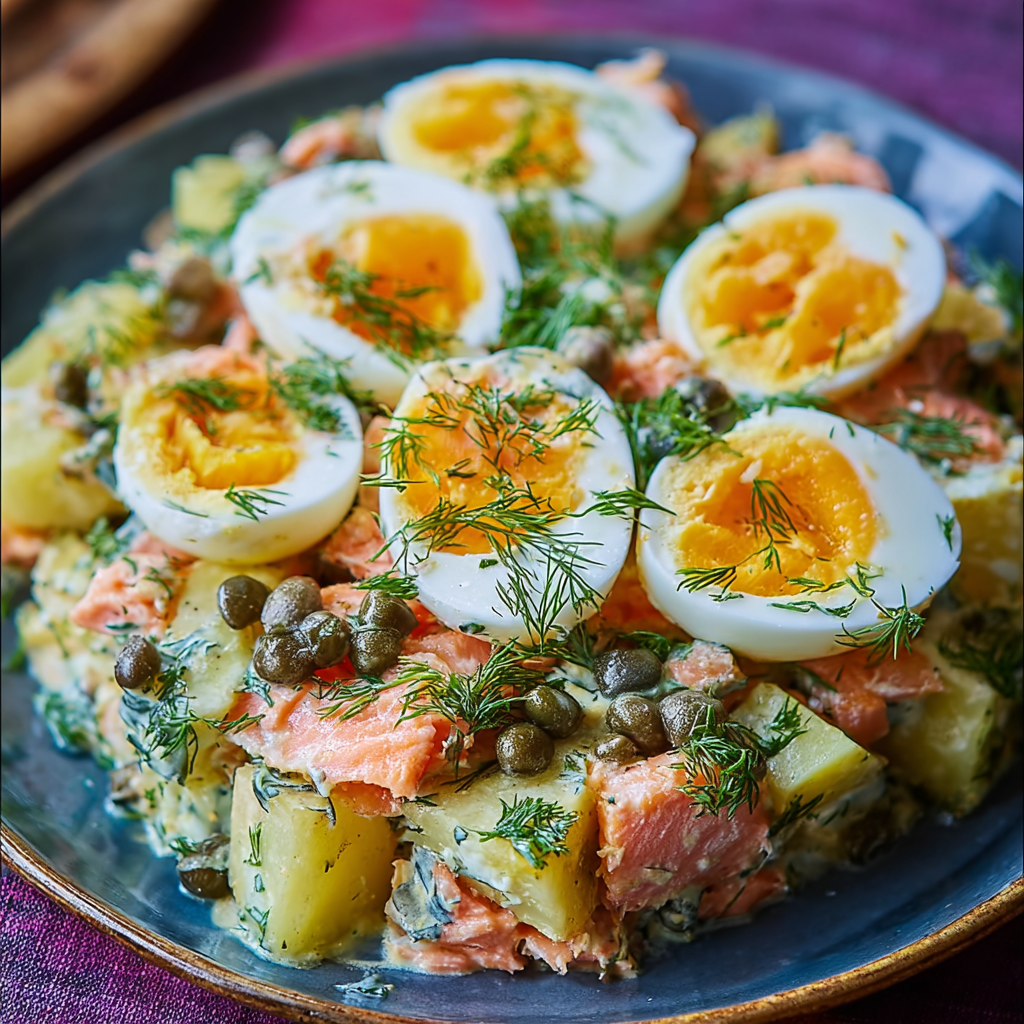
Russian Salmon Potato Salad with Eggs, Dill & Capers
A satisfying Russian-style salad combining seared salmon, tender baby potatoes, soft-boiled eggs, dill, capers and gherkins — perfect for light lunches or a weekend gathering.
Did You Make This?
Leave a comment & rating below or tag @kitchenfunwithmysons on social media!
Rate This Recipe
Share This Recipe
Enjoyed this recipe? Share it with friends and family, and don't forget to leave a review!
Comments (1)
This recipe looks amazing! Can't wait to try it.
Comments are stored locally in your browser. Server comments are displayed alongside your local comments.

Hi, I'm Katie!
What's Popular
30-Minute Meals!
Join to receive our email series which contains a round-up of some of our quick and easy family favorite recipes.