
Christmas Pinwheel Cookies

Festive red, white, and green pinwheel cookies with a tender sugar cookie crumb and optional sprinkle-coated edges — a holiday classic that’s surprisingly simple to make.

These Christmas Pinwheel Cookies have been a staple at my holidays for years; the spiral of red, white, and green always earns gasps at the cookie plate. I first made this version on a gray December afternoon when I wanted something joyful for a neighborhood cookie swap, and the neat, colorful slices felt like packaged cheer. The dough bakes up with crisp edges and a soft, tender interior that melts in the mouth — not overly sweet, with a sturdy enough structure to hold the pinwheel design without collapsing.
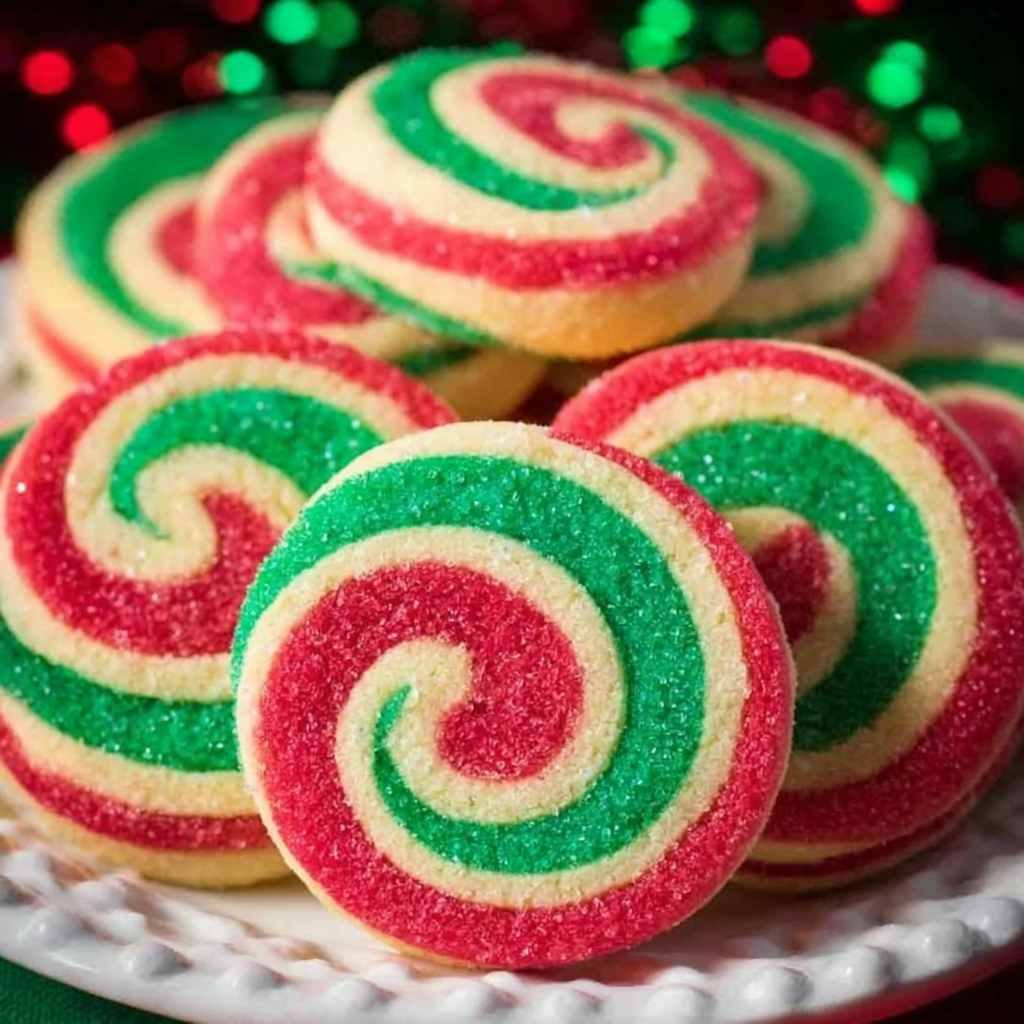
I love the way the three layers give both visual impact and a little textural contrast when you add sprinkles to the log edge. Making the dough is straightforward: simple pantry staples, a little patience for chilling, and a few careful rolling tricks. Over the years I’ve learned timing cues — how firm the dough needs to be to roll cleanly, how long to chill the finished log so slices don’t smear, and the oven moment when the center loses its raw shine. These cookies have become my go-to for gifting because they travel well and keep their shape in a tin.
Why You'll Love This Recipe
- Striking presentation with minimal effort: three simple dough colors form an elegant spiral that looks bakery-made without advanced decorating skills.
- Made with pantry staples like all-purpose flour, sugar, butter, and an egg — no special flours or stabilizers required, and measurements are provided in US cups and ounces.
- Make-ahead convenience: the dough can be shaped, chilled, and sliced later, which is perfect for busy holiday schedules or cookie exchanges.
- Flexible and forgiving: you can roll thinner or thicker slices for yield control, add sprinkles for festive edges, or swap flavors for seasonal variations.
- Kid-friendly assembly tasks include rolling out layers and choosing sprinkles, making this a fun family baking project that yields about 30 cookies in the size shown.
My family still remembers the first year I made these: my niece insisted on taking photographs because they looked like candy canes. Guests always ask how I got such crisp spirals; the secret is firm, well-chilled dough and a steady, tight roll. After a few batches you’ll develop a feel for how much chilling is enough and how thin you like your slices.
Ingredients
- All-purpose flour: Use 3 cups (12.75 oz) of a reliable brand like King Arthur or Gold Medal. The flour provides structure and a clean, short crumb; spoon it into the measuring cup to avoid packing and to keep cookies tender.
- Baking powder and salt: 1 teaspoon of baking powder and 1/2 teaspoon of fine salt balance lift and flavor. Use a fresh tin of baking powder for the most consistent puff.
- Unsalted butter: 1 cup (8 oz) at room temperature. Good-quality butter (Challenge, Kerrygold, or a trusted store brand) gives the best flavor and even spreading; soften to the point where a finger makes an impression without the butter appearing oily.
- Granulated sugar: 1 1/4 cups (8.75 oz). This amount yields cookies that are sweet but not cloying and helps the edges crisp while keeping centers tender.
- One large egg: At room temperature to help bind the dough and promote even mixing.
- Vanilla extract: 2 teaspoons of pure vanilla for depth; feel free to try almond extract in part for a different note.
- Gel food coloring: Red and green gel colors (Americolor or Wilton) give vibrant hues without watering down the dough. A little gel goes a long way.
- Sprinkles (optional): 1 cup (6.75 oz) for coating the log edges — nonpareils or jimmies both work depending on the look you want. Toasted coconut or chopped nuts are alternative coatings.
Instructions
Combine dry ingredients: Whisk together the 3 cups (12.75 oz) all-purpose flour, 1 teaspoon baking powder, and 1/2 teaspoon salt in a medium bowl until evenly distributed. Set aside so you can add them quickly to the creamed butter without overworking the dough. Cream butter and sugar: In a stand mixer fitted with the paddle or with a hand mixer, beat 1 cup (8 oz) room-temperature unsalted butter and 1 1/4 cups (8.75 oz) granulated sugar at medium speed for 2 to 3 minutes until light and fluffy. Scrape down the bowl once to ensure even aeration. Add egg and vanilla: Reduce the mixer to low, add 1 large room-temperature egg and 2 teaspoons vanilla extract, and mix until fully incorporated. This step produces a cohesive, slightly glossy base for the dough. Incorporate the flour: With the mixer on low, add the dry ingredients gradually until just a few streaks of flour remain. Stop mixing and finish folding by hand with a spatula to avoid overdeveloping gluten. The dough should be soft, supple, and not sticky. Divide and color the dough: Divide the dough into three equal portions (about 10 oz each if you use a kitchen scale). Leave one portion plain and tint the other two with red and green gel colors. Knead gently by hand or pulse briefly in the mixer so the color distributes without overworking. Chill the discs: Form each color into a disc, wrap tightly in plastic wrap, and refrigerate for at least 45 minutes until firm. Chilling reduces spreading and makes rolling more precise. Roll into rectangles: Working on parchment, roll each chilled disc between two sheets to a long rectangle roughly 6 x 13 inches. Avoid adding extra flour; if the dough warms and becomes sticky, return the pieces to the refrigerator briefly. Stack and roll: Stack the rectangles in order: green on the bottom, plain in the middle, red on top. Using the parchment to help, roll the stacked layers tightly into a spiral log. Aim for a firm, even roll so slices look neat when cut. Optional sprinkle coating and final chill: Brush the log lightly with a thin layer of corn syrup diluted with a few drops of water, then roll it on a baking sheet covered with sprinkles so the edges stick. Wrap tightly and refrigerate for at least another 45 minutes until firm throughout. Slice and bake: Preheat the oven to 350 F. Use a large, sharp chef’s knife to cut rounds a little under 1/2 inch thick (about 30 cookies at this thickness). Place slices on parchment-lined baking sheets with a few inches between them, and bake 13 to 15 minutes until puffed and the center has lost its raw shine. Remove and cool on a rack.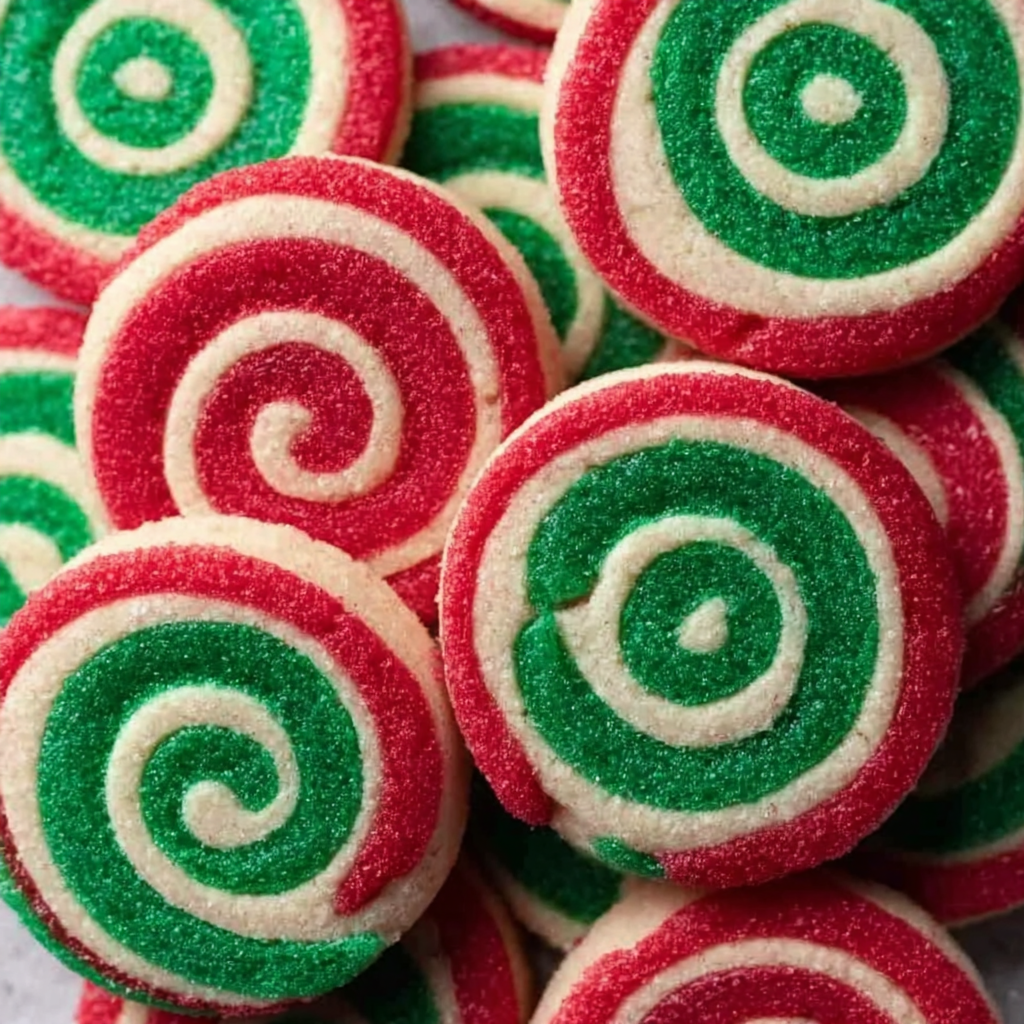
You Must Know
- These cookies keep well at room temperature in an airtight container for 4 to 5 days; for longer storage, freeze unbaked slices or the whole wrapped log for up to 3 months.
- Because the dough is rich in butter, make sure your oven temperature is accurate — an oven thermometer is a useful investment for even baking.
- Use gel food coloring to avoid adding liquid that could alter dough consistency; gel yields more saturated hues with less work.
- Chilling between each major step is critical: it makes slicing clean rounds and retains the spiral definition during baking.
What I love most about these cookies is the predictability: once you master the chilling rhythm they reproduce beautifully batch after batch. Family members often request a second tin to take home, and they photograph exceptionally well on a holiday platter. The sprinkle edge is optional but always draws compliments.
Storage Tips
Store cooled cookies in a single layer or with parchment between layers inside an airtight container at room temperature for up to 5 days. For longer keeping, freeze slices that haven’t been baked or the finished wrapped log for up to 3 months; thaw in the refrigerator overnight before slicing and baking. When reheating baked cookies, crisp the edges gently in a 300 F oven for 5 minutes to revive texture without drying the centers.
Ingredient Substitutions
You can substitute part of the butter with high-quality shortening if you need less spread, though it will slightly change flavor. Swap 1/2 teaspoon almond extract for some of the vanilla for a nutty twist. For a chocolate swirl, replace one third of the plain dough with 1/4 cup unsweetened cocoa powder mixed into 2 tablespoons of flour from the total to keep the dough texture balanced. If you need dairy-free, use a stick-style vegan butter and a flax egg (1 tablespoon ground flax + 3 tablespoons water) but expect small differences in browning and flavor.
Serving Suggestions
Arrange slices on a festive platter with a few sprigs of rosemary for color contrast. These pair beautifully with hot chocolate, mulled wine, or a strong black tea. For a dessert board, include other textural elements like chocolate bark, candied nuts, and dried cranberries. Their compact size also makes them ideal for cookie boxes and hostess gifts.
Cultural Background
Swirled cookies have a long tradition in European baking where patterned pastries and cookies signaled care and celebration. The pinwheel design became popular in American home baking because it’s visually impressive yet accessible — an excellent way to adapt simple sugar cookie dough into a holiday statement. Over time, bakers have added colored doughs or flavor variations for seasonal celebrations around the world.
Seasonal Adaptations
Adapt the colors for any holiday: orange and black for Halloween, pastels for spring holidays, or a rainbow for Pride events. For winter warmth, fold 1/2 teaspoon ground cinnamon into the plain dough and add a pinch of nutmeg to the colored portions. Citrus lovers can add 1 teaspoon finely grated lemon or orange zest to the plain layer for brightness.
Meal Prep Tips
Make the dough up to two days ahead and keep wrapped in the refrigerator; slice and bake the night before your event. For cookie swaps, freeze fully baked cookies between sheets of parchment in a single layer then transfer to a freezer-safe container — they thaw in about an hour and taste freshly baked after a quick warm-up.
These pinwheel cookies bring simpler ingredients together into a joyful, shareable treat. Whether you’re baking with kids or preparing dozens for a party, the disciplined steps of chilling and tight rolling reward you with neat, festive spirals every time. Give them a try and feel free to make the colors and flavors your own — that’s half the fun of holiday baking.
Pro Tips
Chill the log until firm before slicing to avoid misshapen cookies.
Use gel food coloring to prevent adding extra liquid to the dough.
Slice with a large, sharp chef's knife and wipe the blade between cuts for clean edges.
This nourishing christmas pinwheel cookies recipe is sure to be a staple in your kitchen. Enjoy every moist, high protein slice — it is perfect for breakfast or as a wholesome snack any time.
Tags
Christmas Pinwheel Cookies
This Christmas Pinwheel Cookies recipe makes perfectly juicy, tender, and flavorful steak every time! Serve with potatoes and a side salad for an unforgettable dinner in under 30 minutes.
Ingredients
Dough
Decoration
Instructions
Combine dry ingredients
Whisk together flour, baking powder, and salt in a bowl and set aside so they are ready to mix into the creamed butter without overworking the dough.
Cream butter and sugar
Beat room-temperature butter and granulated sugar at medium speed for 2 to 3 minutes until light and fluffy, scraping the bowl once for even aeration.
Add egg and vanilla
Mix in the large room-temperature egg and vanilla on low speed until incorporated to create a smooth, cohesive base.
Incorporate flour
Add the dry ingredients with the mixer on low until few streaks remain, then finish by hand with a spatula to avoid gluten development; dough should be soft and not sticky.
Divide and color
Split the dough into three equal portions (about 10 oz each), leave one plain and tint the other two with gel food coloring, kneading gently until uniformly colored.
Chill discs
Shape each color into a disc, wrap tightly, and refrigerate for at least 45 minutes until firm enough to roll.
Roll rectangles
Between two sheets of parchment, roll each chilled disc to roughly 6 x 13 inches without adding extra flour; if dough softens, chill briefly.
Stack and roll into log
Stack layers in order (green, plain, red) and roll tightly into a long spiral log using the parchment to help maintain an even shape.
Optional sprinkle coating and final chill
Brush the outside lightly with diluted corn syrup and roll on sprinkles to cover the edge if desired; wrap and chill the log another 45 minutes until firm.
Slice and bake
Preheat oven to 350 F. Slice the chilled log just under 1/2 inch thick and bake on parchment-lined sheets for 13 to 15 minutes until puffed and no raw shine remains in the center; cool on a rack.
Last Step: Please leave a rating and comment letting us know how you liked this recipe! This helps our business to thrive and continue providing free, high-quality recipes for you.
Nutrition
Did You Make This?
Leave a comment & rating below or tag
@kitchenfunwithmy3sons on social media!
Categories:
You might also like...
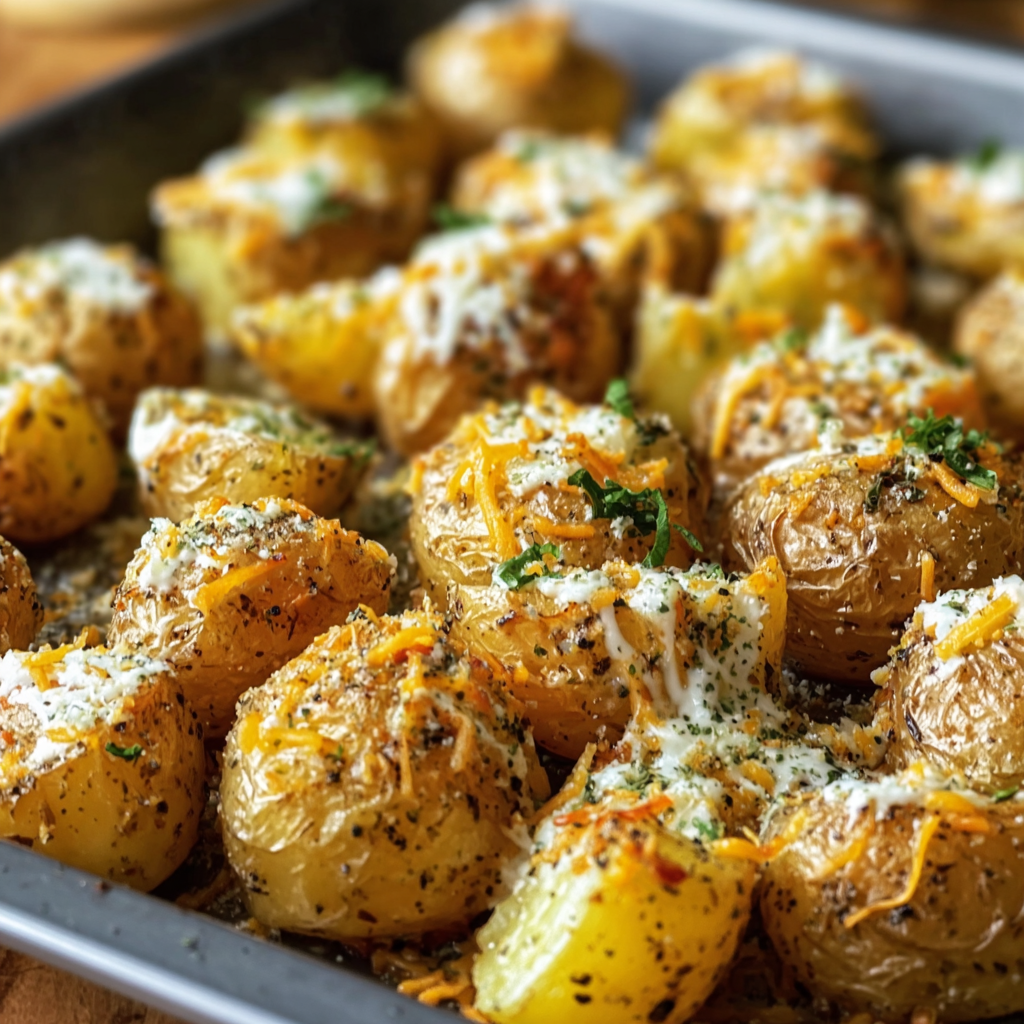
Cheesy Ranch Oven Roasted Potatoes
Golden baby potatoes roasted until crisp and tossed in ranch seasoning, Parmesan, and melty cheddar — an easy, crowd-pleasing side that’s ready in under an hour.
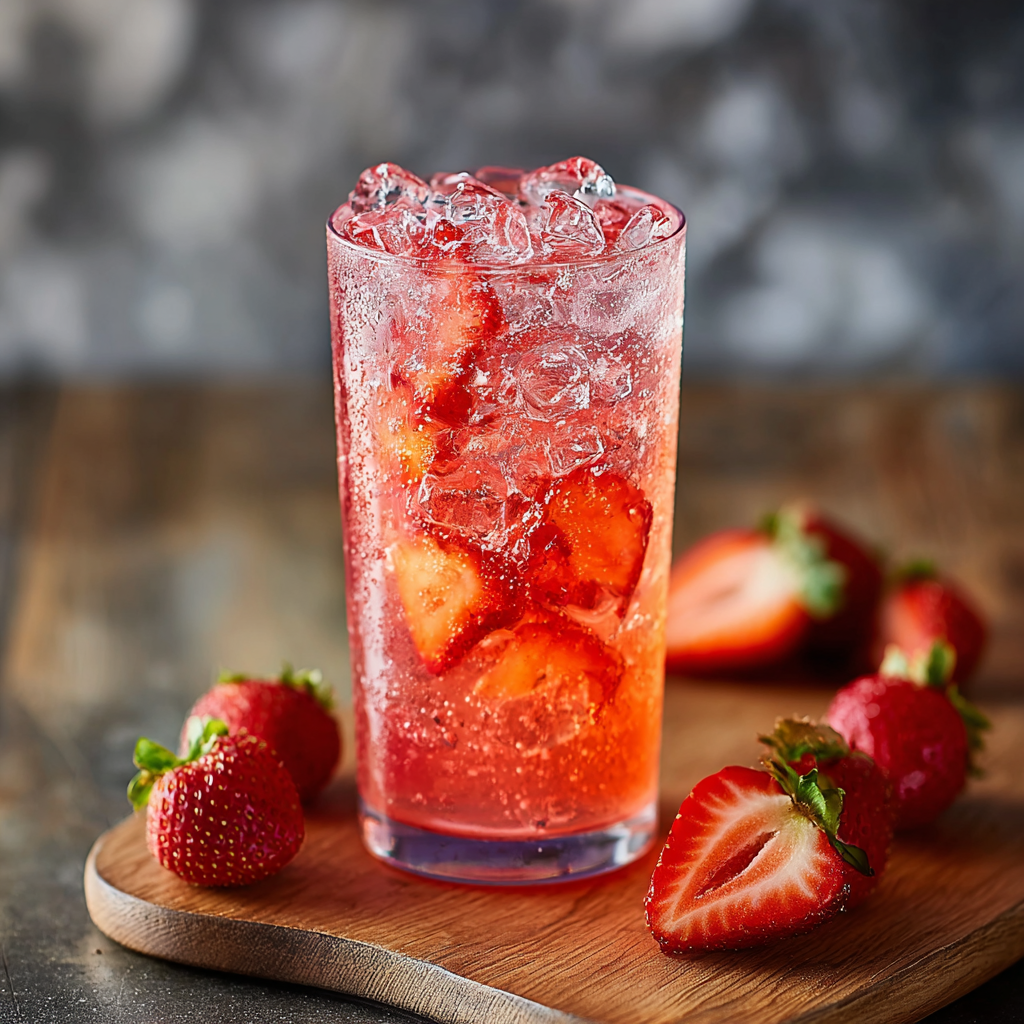
Strawberry Dirty Sprite Drink
A fizzy blend of strawberry syrup, fresh lime, and lemon-lime soda, served chilled with vibrant garnishes for the ultimate refreshing beverage — boozy or not.
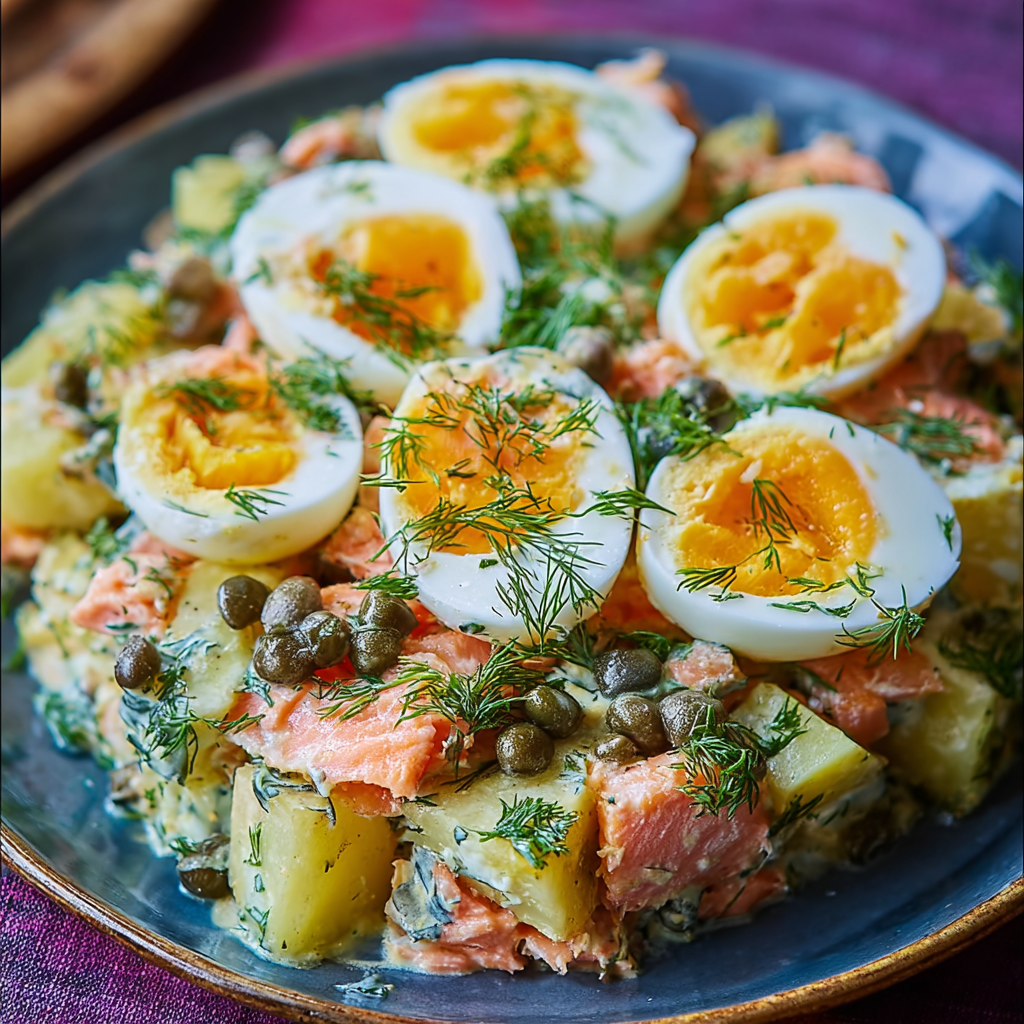
Russian Salmon Potato Salad with Eggs, Dill & Capers
A satisfying Russian-style salad combining seared salmon, tender baby potatoes, soft-boiled eggs, dill, capers and gherkins — perfect for light lunches or a weekend gathering.
Did You Make This?
Leave a comment & rating below or tag @kitchenfunwithmysons on social media!
Rate This Recipe
Share This Recipe
Enjoyed this recipe? Share it with friends and family, and don't forget to leave a review!
Comments (1)
This recipe looks amazing! Can't wait to try it.
Comments are stored locally in your browser. Server comments are displayed alongside your local comments.

Hi, I'm Katie!
What's Popular
30-Minute Meals!
Join to receive our email series which contains a round-up of some of our quick and easy family favorite recipes.